Friday, May 23, 2008

Color Correction Part II


OK, now that we've got all our preferences set we're ready to correct some photos. Here's basically what we're going to be doing with those eyedroppers - finding something in the photo that's supposed to be Black and clicking on it with the black eyedropper, finding something that's
supposed to be white and clicking it with the white eyedropper and finally finding something neutral gray and clicking it once with the gray eyedropper. Sounds simple enough, but finding those items isn't always so easy. So let's see how we go about it...

Let's start in the shadows first. I like to always use the Adjustment Layers found in the half black half white circle at the bottom of the layers palette so as to give me an escape clause if I really monk this thing up. So go and pick Curves from the Adjustment Layers to bring back up the Curves dialog box. I started with blacks first, as they are usually the easiest to find in a photo. Anything black will do - dark shadows, clothing, car tires, etc. So just click the black eyedropper and then go click that thing in the photo. However, if you can't find anything black, the Curves dialog can help. If you look directly under the histogram there are two sliders - one under black and one under white. Grab the one under the black and hold the ALT/OPTION key down. As you slide the slider to the right (towards white - still holding ALT/OPTION) the image will turn white and as you slide the first areas that show up on screen are the darkest areas of the photo. Remember where they are and slide everything back to their starting positions and
release the ALT/OPTION key. Now click the black eyedropper and go click in the photo where it first appear during that last trick.

Now we're going to do the very same thing for the white eyedropper except reverse it. This time use the slider on the right side under the whites and hold ALT/OPTION as you slide this slider tot he left. The image will turn black and the first things that show up white are the lightest parts of the image. Remember where they are and return everything to the starting position and then grab the white eyedropper and go click the spot. The only trick here is to find something that's
truly white in the image, don't be fooled by lights, reflections, etc. that have no detail. These are called specular highlights and will not help you in this case.

The last thing we have to do is find a neutral gray. Unfortunately, there isn't a find a middle gray trick in the Curves dialog. Or is there? I'll give you two methods I use to find neutral gray, one I got from Dave Cross and the other I just discovered one day. I tell you my discovery method first as it's the simplest, but not as exact as the others.

Method 1) First, make sure none of the eyedropper buttons are depressed (if they are, try and cheer them up! OK, bad humor.) Then go out into the actual photo and click and hold. The cursor will change to an eyedropper, and as you move around (while holding the mouse button), a corresponding dot will be sliding up and down the line in the histogram depending on where you are clicking. If you can find a spot that puts that dot in the dead center of the graph - you've found your gray spot! I'll admit, you get much better at predicting where a neutral gray might
exist with lots of practice. Anyway, remember the spot - go back and get the gray eyedropper and click it! You now have a scientifically color corrected photo, but there's one more step before we leave the Curves dialog box - so read on.

Method 2) Dave Cross showed this on one of his tours and it blew me away. I had finally found a sure fire way to find neutral gray. Go ahead and click OK in the Curves dialog box, we're not finished, but we can come back and we don't want to lose the Black and White info we've already set. Alrighty now then, let's add a new layer using the Create New Layer button on the bottom of the layer panel. Then go under the Edit menu and choose Fill. In the dialog drop down the options for Use and choose 50% gray - then click OK. Now change the blend mode of this new layer to Difference. Now we have an interesting image, but hang on! Go back to the Adjustment Layers and choose Threshold. When the dialog opens, drag the slider all the way to the left until the photo turns completely white. Then slowly start dragging it back towards the right. The first areas to turn black is your gray correction point. Remember where it is in the photo, or hold the Shift key down and click in the photo to "mark" it. Now just click Cancel in the Threshold dialog box as you don't need it anymore. You can/should also delete the 50% gray layer too as it has served it's purpose. Now double-click the Curves layer thumbnail to re-open it and use the gray eyedropper to click the spot you just found. You now have a scientifically color corrected photo, but there's one more step before we leave the Curves dialog box - so read on.

Finishing up, in the histogram, click once on all three line intersections along the line and the graph (see photo). Then click once on the lower left dot and press the down arrow on your keyboard 7-9 times. Now click once on the upper right dot and press the up arrow on the keyboard 7-9. This is adding contrast to the photo, the more you press the arrow keys, the more contrast you get. Set it to taste and click OK in the Curves dialog! There is you color corrected image.

Friday, May 16, 2008

Color Corrections Part I


OK Class...

Well the best laid plans of mice and men right? My Camtasia studio has decided it doesn't want to play today, so who's up for a typed tutorial?!?

Before we do any color correction we need to change a few default Photoshop settings.

1) Go to the eyedropper tool and look at the options at the top of the screen. Where it says Sample Size:, I'm betting yours still says Point Sample. If it does we need to change that to 3x3 (or higher for really hi-res images). Why? At Point Sample, it only gives you a reading of one teeny tiny individual pixel. What we want is an average of the area we're clicking as this is a much more accurate setting for color correction.

2) While having cool desktops and colorful wallpapers and background are cool - you won't find any pros doing color correction with colorful surroundings. Heck, the real pros even paint their rooms a neutral gray so as not to be influenced by color. You CAN NOT trust your eyes while doing color correction - they will lie to you every single time no matter what your vision is. There is a really cool video that shows this here. Go watch it and come back, I'll wait......................


OK, you're back. To resolve this in Photoshop, just press the F key once. This centers your image full screen on a neutral gray background. BTW, pressing F three more times will return you back to the default view (and cycles through some other cool views too).

3) And finally, we need to re-set some colors in Photoshop to be more realistic. Photoshop ships with white being pure white and black being pure black, which is fine in most cases, but in print photography that is bad. If something were to print pure white, it would in effect put NO ink on the paper in that spot. So, here's how we fix it. Go to Image - Adjustments - Curves. Curves is hands down the choice of the pros for color correction. But we're not ready for that yet. We're still setting preferences. OK, in the curves dialog box, under the histogram, there are three eyedroppers - Black, Gray, and White for Shadows, Mid-tones, and Highlights. We want to double-click the left one (Black) which brings up a color picker. We want to replace the R,G,B values which are probably sitting at 0. So For R, enter a value of 10. Same for G and same for B. So now we have RGB all equaling 10, so we can click OK to save these values and return to the Curves dialog box. Now, we're going to do the same thing for the Middle/Gray eyedropper and the Right/White eyedropper using the values listed below. Each time after setting the RGB values in the color picker - clicking OK to return to the Curves dialog box, but not clicking OK to exit the Curves box until all three have been done.

Black: 10,10,10 Gray: 133,133,133 White: 245,245,245

Now, after setting all three eyedroppers, we can finally click OK on the Curves dialog box and it will ask if you want to Save the New Target Colors as defaults? Click YES - and from now on, these will be the values used to color correct your photos. You will not have to go through this process anymore! Yea!

Now, you're ready to color correct your photo, See Color Corrections Part II coming up!

Wednesday, May 14, 2008

Still here!

Sorry for the lack of info lately, but I've been on the road doing on-site training in Winston-Salem and other places. No time to blog and it's killing me! More soon!

Monday, May 5, 2008

Great Shots - Level II and MORE!!!

Good Evening Guys and Gals!

Breaking news! You asked, and now I can announce it. This Fall (November 15th), Great Shots Level II will be held. And what's better - Great Shots will now be a 5 class Certificate program. Complete all 5 classes and the college will award you a certificate in Digital Photography. Stay tuned for more as it develops!

Saturday, May 3, 2008

Farewell from Cincinnati...And A Personal Thank You


I'm sitting in the airport in Cincinnati, and the past week is still swirling through my head - and it occurs to me that I need to do a public/personal Thank You...

David,
I felt the need to let you, LaDawn, Jennifer, Geoffrey, Staci, Nick, Sharon and anyone else from your wonderful staff know that I had a great experience at your Digital Master Class. Your warmheartedness, caring and willingness to open your home, business and personal lives with 20+ relative strangers made for an incredible week. I feel I have formed lifelong friendships. I wish I was more articulate to express my gratitude as "Thank You" doesn't quite seem to be enough. I hope our paths cross many more times. God Bless you all.
Chris

Now back to the rest of you... ;-)

I spent the week telling you how you should be signing up for David's class. I hope you know now how superb David's Digital Master class is. Like Scott Kelby (the Grand Poo-Bah himself) says, "attending David's classes are like standing there watching David shove money in your pockets." However, I say all that to say this...

If Digital ProTalk is not on your daily reading list, then make sure you catch up on the week of posts on the weekend. If you're not doing that, well then put your camera down - you might not be worthy of using it! Seriously folks, subscribe yourself and make it required reading.

With that, my boarding call has just been announced...farewell Cincinnati, it's been a blast!

Friday, May 2, 2008

Day 5 - David Ziser's Digital Master's Class

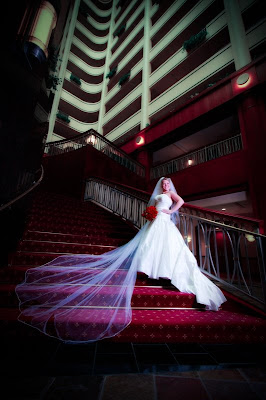
I'm so sad.... I can't believe ....it's over! Here's one more of Sarah in the pose a majority of the class voted as their favorite (I personally liked the one out at Dree's Pavilion, but hey... that's what's so cool about photography - there's no right or wrong, just a personal preference.) She descending the staircase at the Marriott in Cincinnati, and it is a lovely pose.

Today's Recap:

Well I'm back to wrap up one amazing week. We finished the door prize drawings, if you haven't figured it out by now, everybody wins something. Today was the big day of prizes - there were two B&H Photo gift certificates given away, and the nicest prize of the week was about a $200 collection of NIK Software plug-ins for Photoshop!

Several people had to catch early flights home, so David began the day on the run. We covered how to use the best flash light we could, and saw examples of how on camera flash has a real hard time making people pretty. There are some tricks to make it better, but nothing to make it great. We then covered off camera flash, bare bulb lighting, room lights, multiple lighting setups, and how David typically shoots a wedding and reception.

Then due to people leaving we had a graduation ceremony. David thanked his staff publicly for the huge effort to make this week an awesome week. Then he called each of us up individually and thanked us for coming and presented us with a graduation certificate and class photo.


After some brief goodbye's, we were right back into the materials covering lens selections and how to use them in what scenario in shooting a wedding, shooting in available light, shooting digital, and backup options.

We wrapped the class by covering David's $elling Process and Salesflow. We got to see EVERYTHING about how David sells to his clients. David even shared his contracts and price lists with us. I'm telling you the man shared every single aspect of his business with us all week.

Then it was hugs and handshakes all around and even a few teary goodbyes! A few of us went to lunch together for one last hoo-rah. Then a few of us came back to the hotel where I hosted a little Photoshop tutorial till around 5:00pm.

It was an absolute blast, I learned a ton. I made a bunch of new friends and contacts around the country, and I'm leaving charged up. This was an awesome opportunity and I once again recommend it to anyone. If you do sign up to take his class, please do mention my name. Yes, I get a small reward, but it would be neat for both David and I to know how you got there.

I'll be back Monday with something new. I hope you've had a good time reading this this week. Thanks for your attention...

Thursday, May 1, 2008

Day 4 - David Ziser's Digital Master's Class

Well, once again it's way past 10:00pm and I'm just getting to the PC to blog. Mainly because since 6:30 we've been enjoying a wonderful dinner party at the Ziser house. The food, friendship, camaraderie and fun, made for a truly magical evening. More on that in a bit...

Today's recap:

The day began with another round of door prize giveaways and image reviews. The biggest thing I can remember given away today was a very nice book of merit images from the PPA (Professional Photographers of America).

David then started the day of with a quick finish of the Powerpoint presentation from yesterday, and then went right into the Photoshop section of the class. David demo'd the things he does every day in his studio to fix images. It was nice to see clean, down to earth no frills edits that didn't take all day to get the job done.

After lunch we did a nice long look into Marketing and growing your business. It was very informative and I learned a ton! Some of the ideas I had already thought of or learned from other blogs, but most of it was very enlightening.

Late this afternoon we had a representative from ArtLeather come in and give a introduction to their product and offer us some really nice discounts. Then we actually wrapped early to get to the dinner party at David's home.

The dinner party was awesome, we gathered for drinks and a class photo and then were treated to a delicious dinner of salmon, chicken, pork, vegetable lasagna, rosemary potatoes, some vegetable dishes, croissant rolls and a full rack of deserts. Or model bride and awfully sweet girl, Sarah Dupuy (featured above) was there with her REAL fiance Steven. And we all sat out on the deck laughing, talking, and having a grand time until it was time to go. I was so envious as the house was wide open and we sat outdoors all night and never saw the first bug! If we had done that in North Carolina the house would be filled with bugs and the guests would be a mosquito buffet. Needless to say it was very nice.

And now I sit here. Hardly believing that it all ends tomorrow at noon. It has been so much fun, and so educational. I'm ready to go home and take on the world now, and I highly recommend if you're presented the opportunity - you make every effort to come take this class. (And if you do mention my name when you register!)

I'll blog tomorrow's day too, don't worry! But I have been extremely honored by Terri "I got to get these opossums up to Monterey" Nowling and a few other classmates as they have asked me to stick around tomorrow and give them a little impromptu Photoshop class. Terri's been a neat classmate as she's wanted all week to be on somebody's blog - mainly David's, but somebody's! Well there you go Terri, you've been blogged. Terri acts like she doens't know much, but we've seen some of her work and she's doing just fine. Look for big things from "In The Now Photography" in the very near future!